Dog Arrows: A Practical Embroidery Review
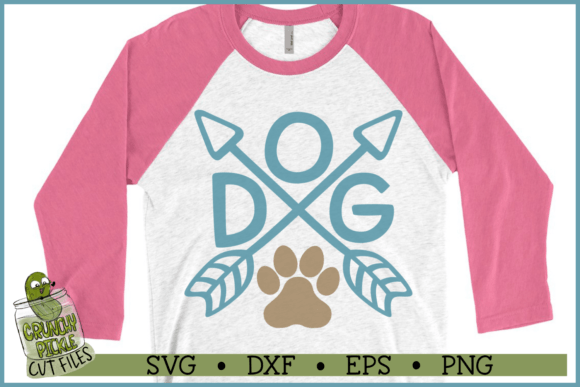
As a designer who’s stitched hundreds of custom pieces—from boutique baby onesies to Etsy shop merchandise—I opened Dog Arrows expecting something playful but functional. What I found was a clean, confident graphic that leans into charm without sacrificing clarity. It’s not overly detailed or fussy—just three stylized arrows forming a loose triangular shape, each tipped with a subtle dog silhouette. The lines are smooth, the negative space generous, and the rhythm feels intentional. It reads as friendly, spirited, and quietly clever—not “cute overload,” but warm enough for a nursery wall or bold enough for a small-batch tote line.
How Dog Arrows Lands in Real Projects
Last week, I used Dog Arrows to embroider a set of organic cotton canvas tote bags for a local pet rescue’s fundraiser. We chose it because it balanced personality with simplicity—no tiny eyes to misfire, no fine linework that would blur on textured fabric. Stitched at 3.2" wide on medium-weight canvas with tear-away stabilizer, the design held its shape beautifully. The satin-stitched arrow edges stayed crisp, and the dog motifs read clearly even from six feet away. Customers responded instantly: “Is that a dog? Oh—arrows! I love that.” That kind of double-take is gold for handmade product storytelling.
It works especially well for custom apparel where legibility matters—think crewneck sweatshirts, relaxed-fit tees, or unisex aprons for dog-friendly bakeries. On a ribbed knit baby onesie? I’d scale it down to 2.5" and add light cutaway stabilizer underneath—just enough support to keep the fill stitch from sinking into the stretch. For an embroidered patch, Dog Arrows translates cleanly: the open layout gives your backing fabric room to breathe, and the consistent line weight means clean edge finishing.
Where It Shines—and Where to Pause
Dog Arrows thrives on stable, flat surfaces: tote bag fronts, tea towel hems, pillow covers, and flat-panel sweatshirt pockets. Its moderate stitch density avoids heaviness on lightweight linen or chambray—ideal for spring-themed kitchen towels or nursery decor. Because it’s built around strong shapes rather than micro-details, it holds up across fabric textures: I’ve seen it look sharp on brushed cotton, soft fleece, and even midweight denim.
That said, avoid using Dog Arrows on highly curved or layered surfaces without testing first—like the front panel of a structured cap or the seam-adjacent area of a zip-up hoodie. The arrow points sit close together, and tight curves can cause slight distortion in satin stitch directionality. Also, skip it on ultra-thin fabrics (think voile or sheer rayon) unless you’re using a floating stabilizer technique—you’ll want full control over thread tension and fabric movement.
For dark fabric, stick with high-contrast thread: creamy ecru over navy, bright white over charcoal, or even mustard yellow over black. On light backgrounds, deep charcoal or forest green adds grounded warmth without fading into the background. Avoid pastel-on-pastel combos unless you’re aiming for subtlety—this design earns its presence through contrast, not delicacy.
What It Adds to Your Handmade Product
When customers see Dog Arrows on a finished item, they register intention—not just decoration. It signals care in curation: the kind of detail that makes a personalized gift feel considered, not generic. That lifts perceived value. For Etsy sellers or small shop owners, it’s a quiet brand amplifier—consistent enough to become recognizable across your product line (tote + tea towel + onesie), but flexible enough to avoid feeling repetitive.
It also builds trust. Because the design avoids visual clutter, it stitches reliably across machines and skill levels. No one’s losing sleep over broken threads in the dog ears or skipped satin stitches in tight corners. That reliability matters when you're fulfilling orders for holiday embroidery, wedding favors, or boutique wholesale runs. And yes—it photographs well. Whether you're building printable mockups or Instagram-ready flat lays, Dog Arrows reads cleanly in both natural light and studio setups.
Practical Notes Every Embroidery Designer Should Check
- Test first—Always run Dog Arrows on scrap fabric matching your final project’s weight and stretch. Watch how the arrows settle on seams or bias cuts.
- Review stitch density—If your machine flags heavy fill areas, consider simplifying one arrow to running stitch for breathability on summer-weight items.
- Confirm hoop size—The design fits comfortably in a 4x4 hoop, but if you’re scaling up for a large tote or blanket corner, check whether your machine handles the expanded dimensions smoothly.
- Inspect small details—Even though it’s minimal, zoom in on the dog silhouettes in your embroidery software. Make sure no stray nodes or overlapping paths will confuse your machine.
- Mock it in black and white—Before committing to thread colors, preview Dog Arrows in grayscale on light and dark fabric swatches. Does the shape still pop?
- Stabilizer matters—Medium cutaway for knits, tear-away for stable wovens, and fusible + tear-away combo for lightweight linens.
- Licensing check—Since Dog Arrows is marketed as a Graphics file for Crafts use, verify whether your intended application (e.g., selling embroidered patches commercially) falls within permitted usage. When in doubt, reach out to the creator.
Ultimately, Dog Arrows isn’t flashy—but it’s thoughtful. It’s the kind of embroidery file that disappears into the product while elevating it: no apologies, no over-engineering, just honest, wearable design. Whether you’re stitching for joy, gifting with meaning, or building a craft business rooted in authenticity, this one earns its place in your digital embroidery file library. Just remember: great design doesn’t shout. It invites a second look—and then stays remembered.